YAY LETS MAKE WINDMILLS YEYEYEY!

You need:

A square piece of paper
Scissors
A pencil
And a couple of pushpins

Ready? OOKKK!

Step 1: Get a square piece of paper of any color, and draw 2 straight lines on it, like this:  
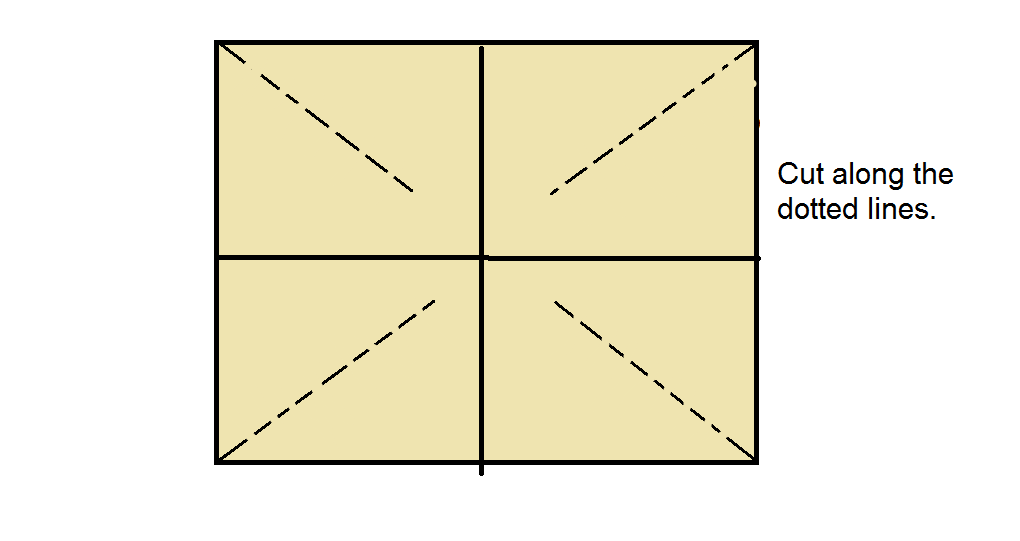
Step 2: Trace 4 diagonal lines from the  corners toward the centers, like this:
Step 3: Cut along each of the diagonal lines. Don’t cut farther than the lines you’ve traced. DO NOT cut the four straight lines.
 
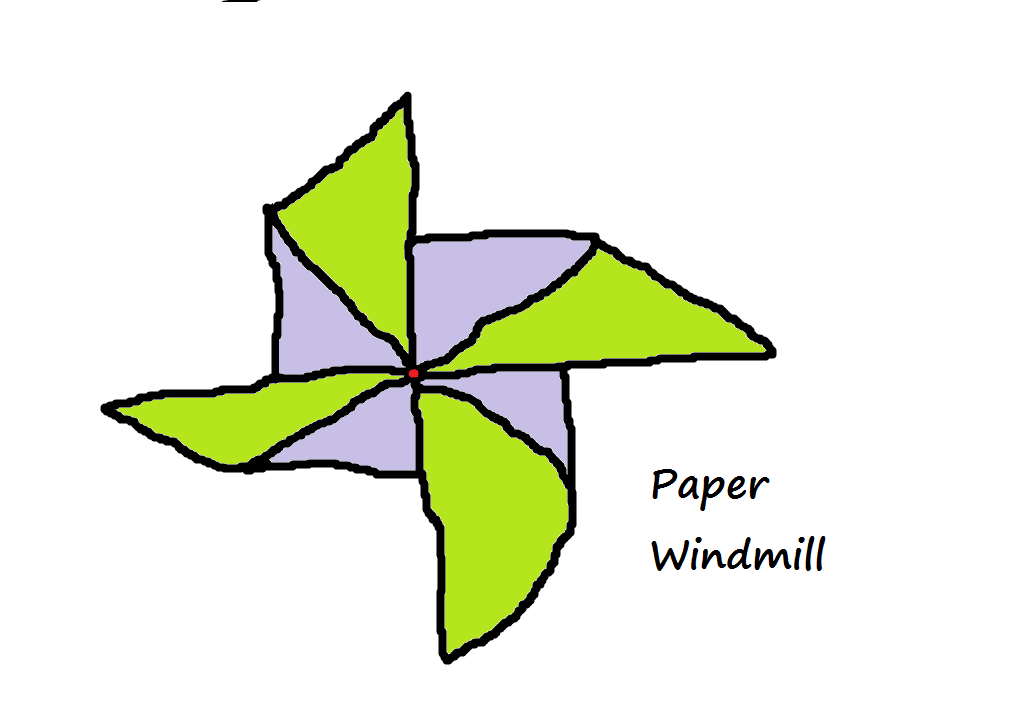
Step 4: Label each line you just cut A, B, C, and D. Pin edges A, B, C and D to the center of the square. Make sure all four corners are overlapping. Then put the pushpin in he center. Yay! Windmills rule. Your finished windmill should look somethin' like this:
#Awesomeness
8/7/2013 03:19:02 am

Does the windmill still work if we attach the finished windmill to a popsicle stick?

Reply
Lady H
8/11/2013 06:32:01 am

Yes, it works fine. As long as your paper and handle have some room between themselves on the pushpin, its ok. Just make sure you cover up any pointy-ends coming out of your handle from the pushpin!

Reply
Lady H
8/11/2013 06:29:51 am

I'm glad one of our assistants at the Blob Blog posted this! I just wanted to say, I did this craft a while ago for the Fourth of July, and I colored my paper red stripes, and blue stars. I thought that was a fun theme for celebrating the fourth! Anyways, I wanted to say that I attached mine to a straw, and my pushpin was too long. So, I cut my straw into small 1/2 inch bits, pushed a few onto the back until the pointy pushpin end was no longer visible or feel-able, and hot glued in place. Have fun making summer windmills!

Reply
hi
8/11/2013 06:35:42 am

this looks fun i liek your site :)

Reply

Your comment will be posted after it is approved.


Leave a Reply.